Uploading your leave data is the foundation of meaningful absenteeism analysis. This guide will walk you through preparing, uploading, and validating your data for accurate insights.
Before You Begin
What You'll Need:
- Leave/absence records in Excel (.xlsx, .xls) or CSV format
- Employee data already uploaded (or upload simultaneously)
- 15-30 minutes for your first upload
Required Data Columns:
| Column | Description | Example |
|---|---|---|
| Employee Number | Unique identifier | EMP001, 12345 |
| Surname | Employee last name | Naidoo |
| Initials | First/middle initials | S.K. |
| Leave Type | Type of leave taken | Sick, Annual, Family |
| Date From | Start date of leave | 2024-01-15 |
| Date To | End date of leave | 2024-01-17 |
| Days | Number of days (can be decimal) | 3, 0.5, 1.5 |
| Department (optional) | Employee's department | Finance, HR |
Step-by-Step Upload Process
Prepare Your Data File
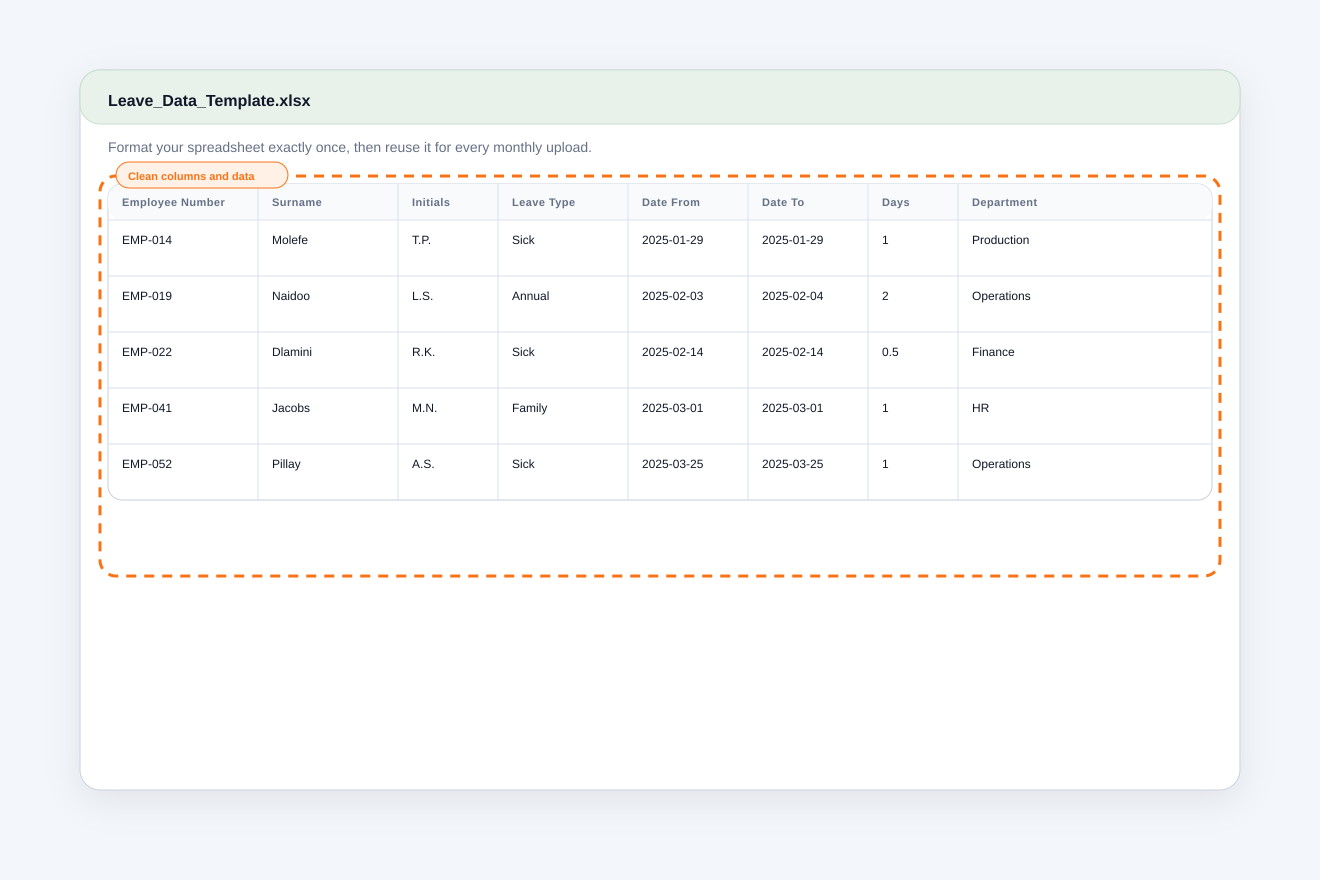
Open your leave data in Excel or export from your payroll/HR system:
- Ensure all required columns are present
- Remove empty rows and unnecessary columns
- Check for consistent date formats (YYYY-MM-DD recommended)
- Verify employee numbers match your employee records
Navigate to Data Upload
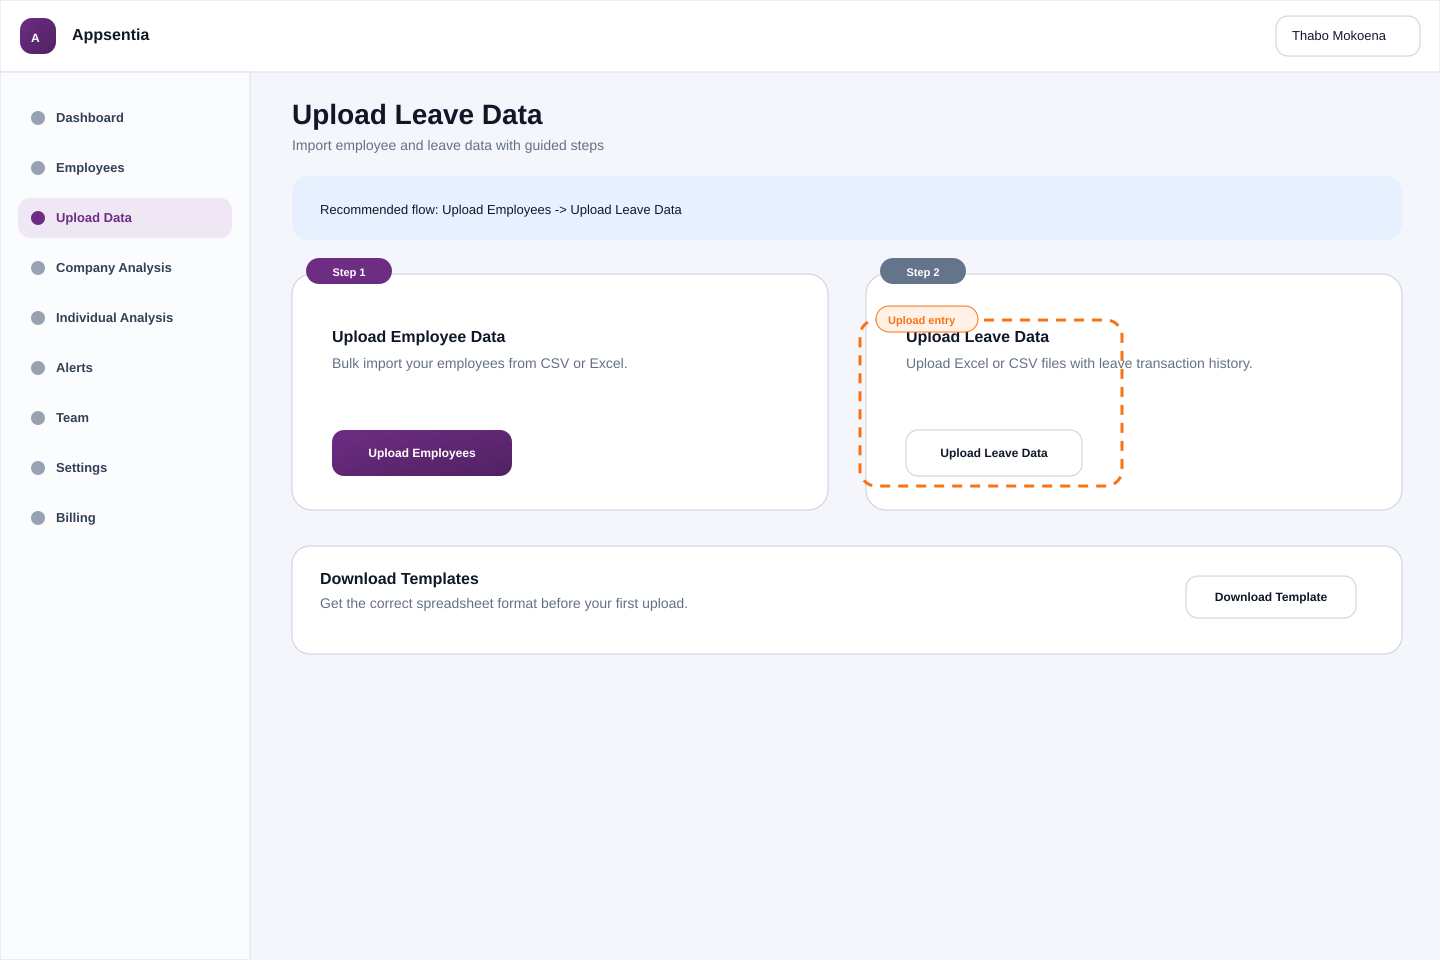
Log into Appsentia and go to Data Upload from the main navigation menu. Click the "Upload New Data" button.
Select Your File
Click "Choose File" or drag and drop your Excel/CSV file into the upload area. The system will immediately validate the file format and begin processing.
Map Your Columns
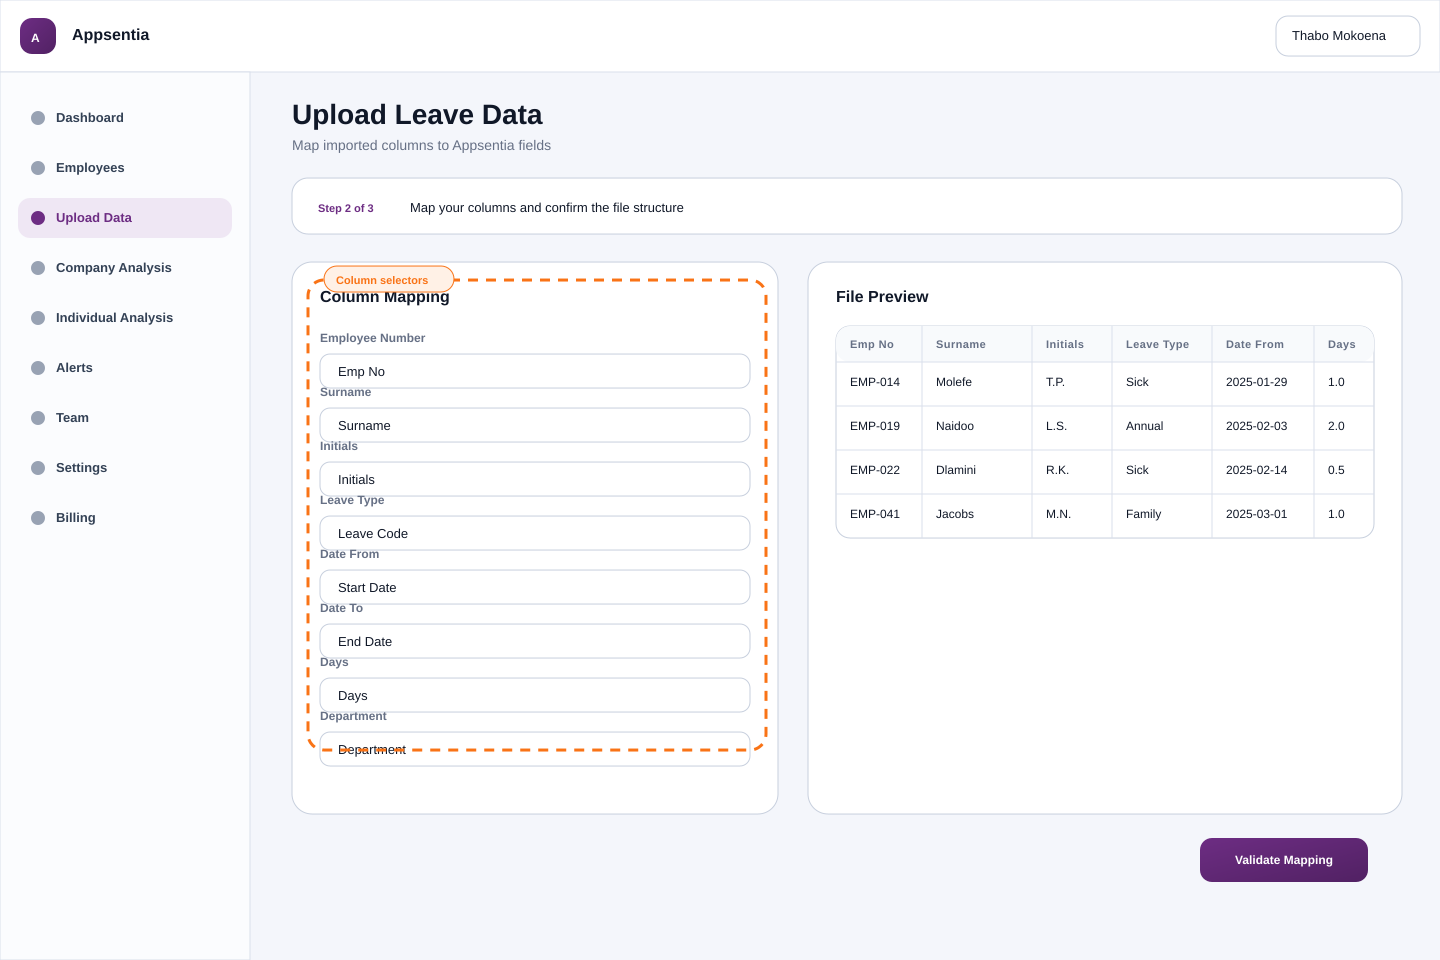
This is the most important step! You'll see a preview of your data with dropdowns to map each column in your file to Appsentia's required fields:
- For each column in your file, select the matching Appsentia field from the dropdown
- Example: Your "Emp No" column → Map to "Employee Number"
- Your "Leave Type" column → Map to "Leave Type"
- If you have columns you don't need, select "Ignore" from the dropdown
Choose Date Format
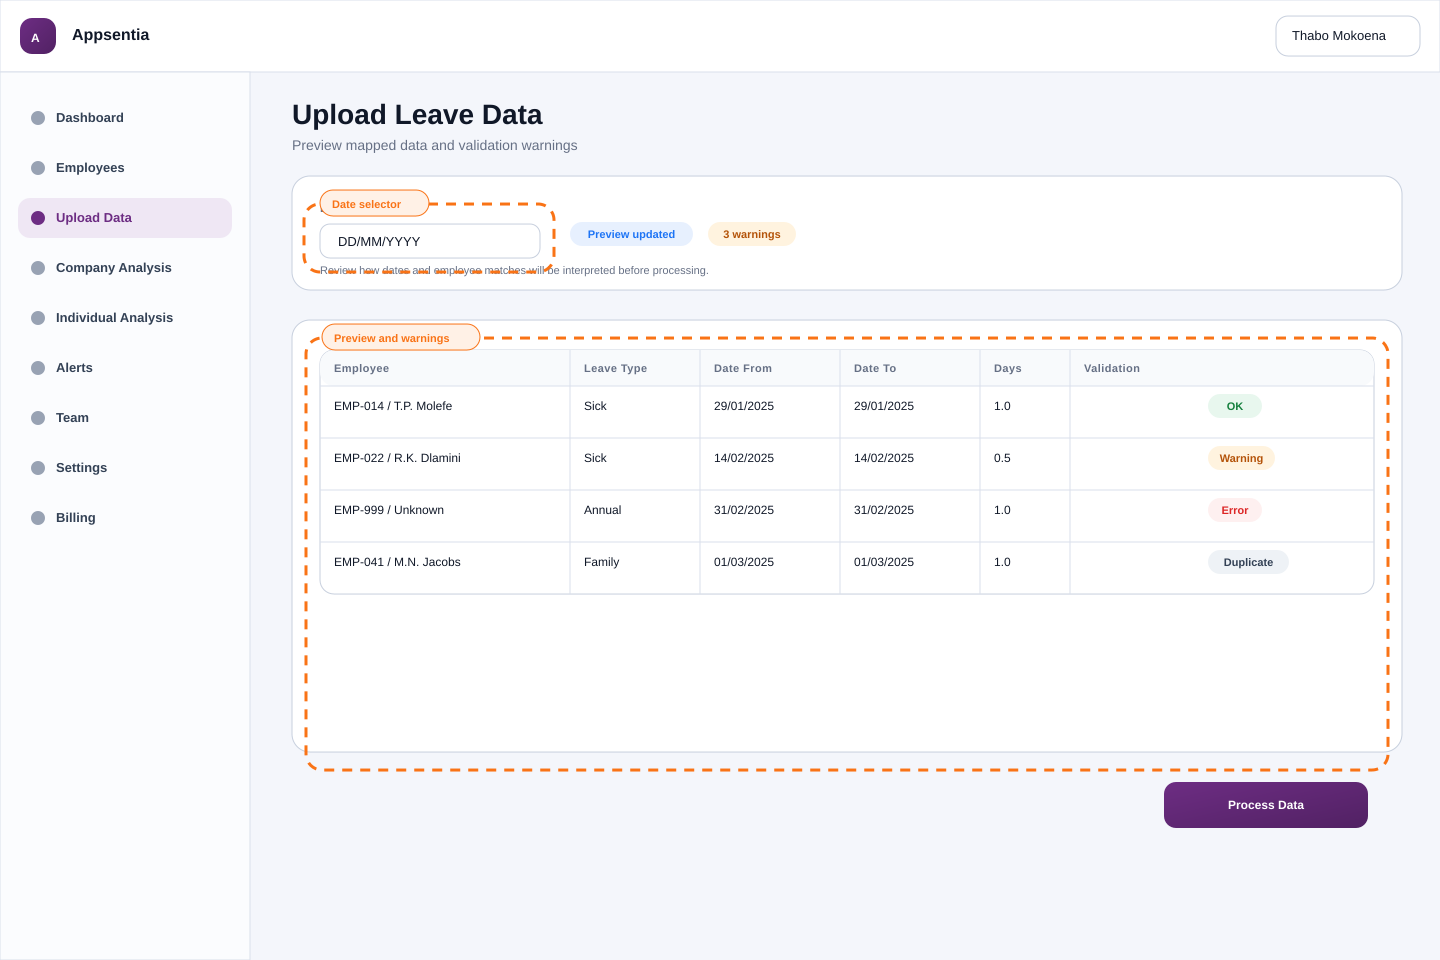
Select how dates appear in your file:
- YYYY-MM-DD: 2024-01-15 (recommended)
- DD/MM/YYYY: 15/01/2024 (common in South Africa)
- MM/DD/YYYY: 01/15/2024 (US format)
The preview will update to show how Appsentia interprets your dates—verify they're correct!
Review Data Preview
Before processing, carefully review the data preview showing:
- ✓ Total records to be imported
- ✓ Date range of the data
- ✓ Sample rows with mapped values
- ⚠️ Any warnings (e.g., employees not found, invalid dates)
Process the Upload
If everything looks correct, click "Process Data". The system will:
- Validate each record against your employee list
- Check for duplicate transactions
- Normalize leave types (e.g., "Sick Leave" → "Sick")
- Calculate business days and flag patterns
- Insert records into your database
Processing typically takes 10-30 seconds for 1,000 records. You'll see a progress indicator.
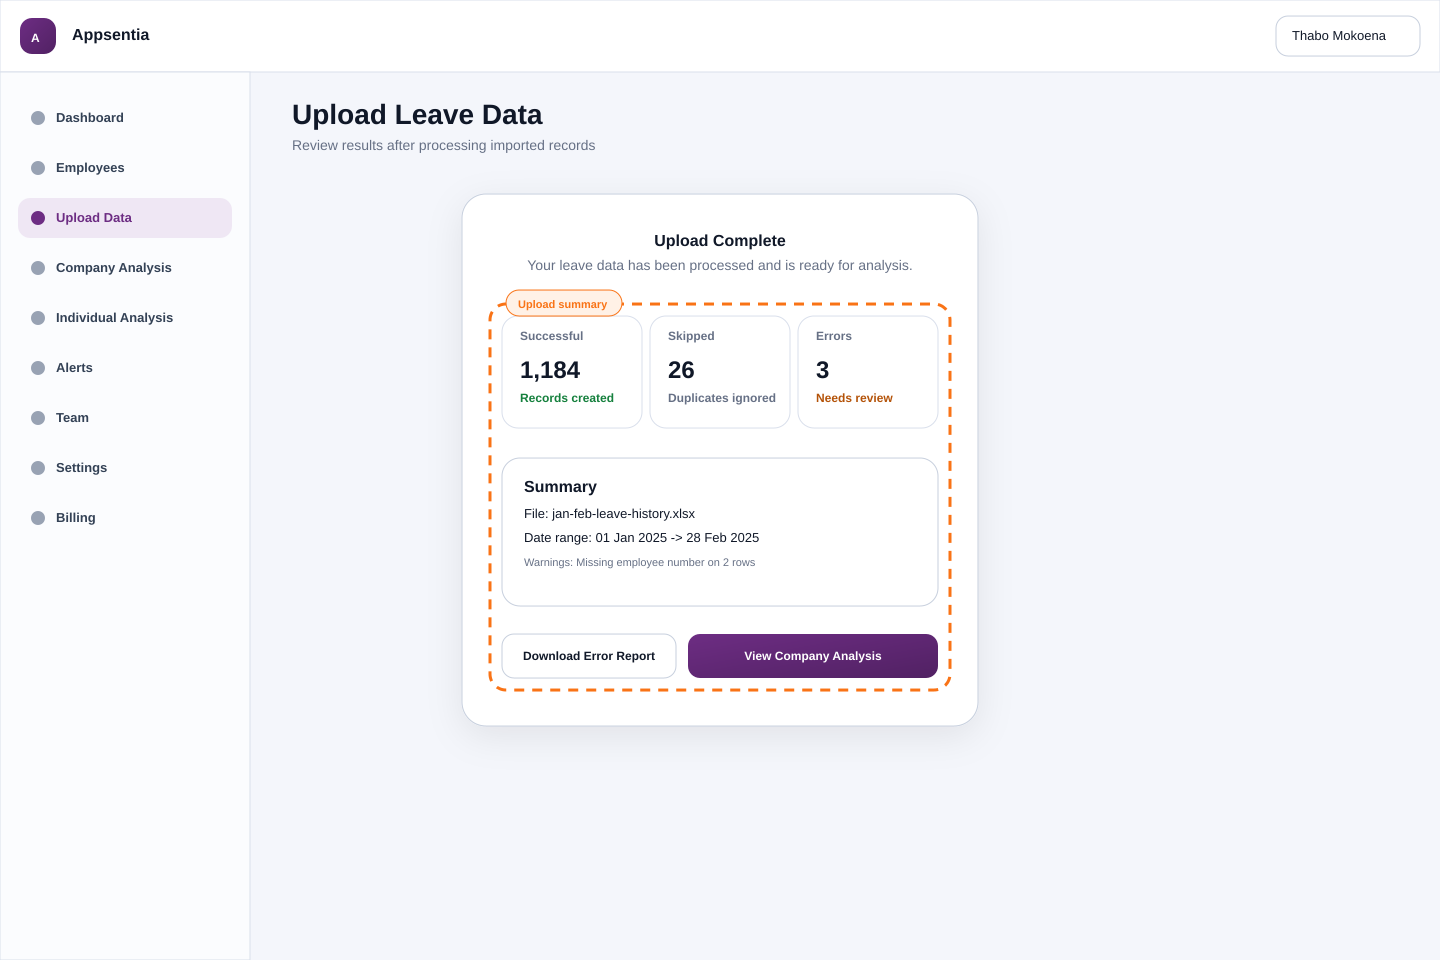
Review Upload Summary
After processing, you'll see a summary report:
- Successful imports: Records added to the system
- Skipped (duplicates): Transactions already in the system
- Errors: Records that couldn't be imported (with reasons)
Troubleshooting Common Issues
❌ "Employee not found"
Solution: The employee number in your leave file doesn't match any employee in the system. Upload employees first, or check for typos in employee numbers.
❌ "Invalid date format"
Solution: Ensure dates are formatted consistently. In Excel, select the date column → Format Cells → Date → Choose a standard format.
❌ "Duplicate transaction"
This is normal: The system automatically prevents duplicate imports. Records with the same employee, dates, and type are skipped.
❌ "File too large"
Solution: Split your file into smaller chunks (e.g., one file per year). Upload them sequentially.
After Your First Upload
✓ Next Steps:
- → Go to Company Analysis to see aggregated insights
- → Check Alerts for employees flagged with suspicious patterns
- → Explore Individual Analysis for specific employees
- → Set up regular uploads (monthly recommended) to keep data current
Best Practices
- • Upload regularly: Monthly uploads keep insights fresh and patterns accurate
- • Save your mapping: Use consistent file formats to speed up future uploads
- • Check for errors: Always review the summary report after processing
- • Backup your files: Keep original files in case you need to re-upload
- • Start small: Test with a small file first to verify your mapping is correct