Accurate employee records are the foundation of meaningful absenteeism analysis. Learn how to add, edit, organize, and maintain your workforce data effectively.
Understanding Employee Records
Each employee record in Appsentia contains:
| Field | Required | Purpose |
|---|---|---|
| Employee Number | Yes | Unique identifier linking leave data |
| Surname | Yes | Employee identification |
| Initials | Yes | Employee identification |
| Department | No | Department-level analytics |
| Date of Employment | No | Tenure tracking |
| Date of Termination | No | Employee lifecycle management |
| Payroll Cycle | No | Payday pattern detection |
| Status | Auto | Active vs Inactive employees |
Adding Employees: Individual Entry
Navigate to Employees
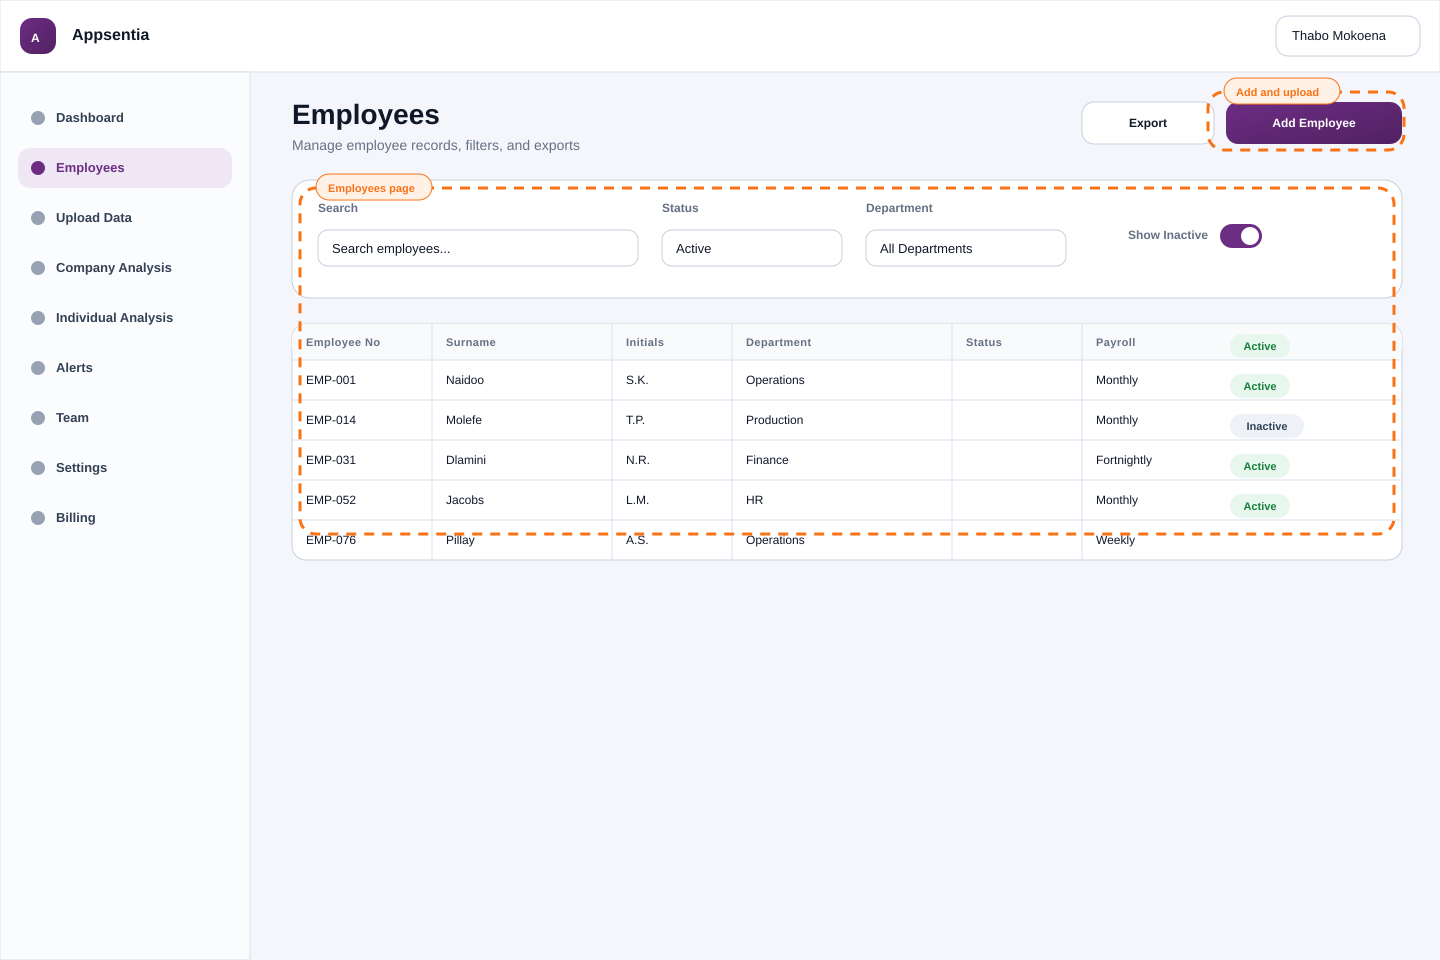
From the main menu, click Employees to access the employee management page.
Click 'Add Employee'
Click the "Add Employee" button in the top-right corner of the employees list.
Fill in Employee Details
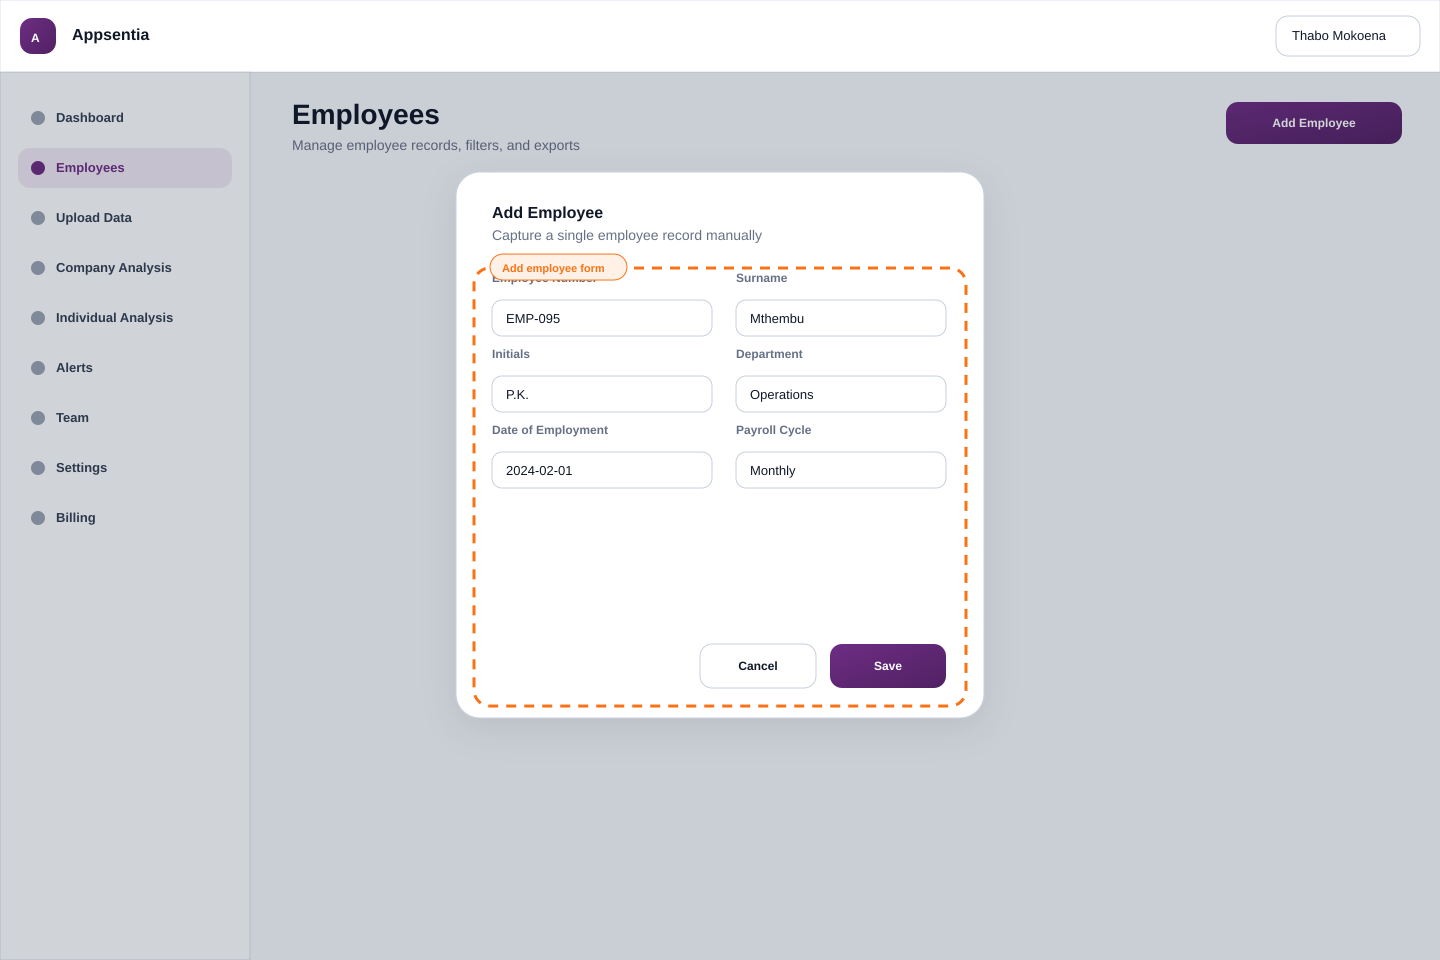
Complete the employee form:
- Employee Number: Must be unique (e.g., EMP001, 12345)
- Surname: Last name as it appears in payroll
- Initials: First and middle initials (e.g., J.P., S.K.)
- Department: Optional but recommended for group analysis
- Payroll Cycle: Select if configured (enables payday pattern detection)
Save and Verify
Click "Save". The employee appears in your employee list immediately and is ready to have leave data attached.
Adding Employees: Bulk Upload
Recommended for 10+ employees to save time and reduce errors.
Download the Template
On the Employees page, click "Upload Employees" → "Download Template". This gives you a pre-formatted Excel file with the correct column headers.
Fill in Employee Data
Open the template in Excel and fill in your employee data:
- One row per employee
- Do not change the column headers
- Leave optional columns blank if not applicable
- Use consistent date formats (YYYY-MM-DD recommended)
Upload the File
Return to Appsentia, click "Choose File", and select your completed template. Click "Upload" to begin processing.
Review Import Summary
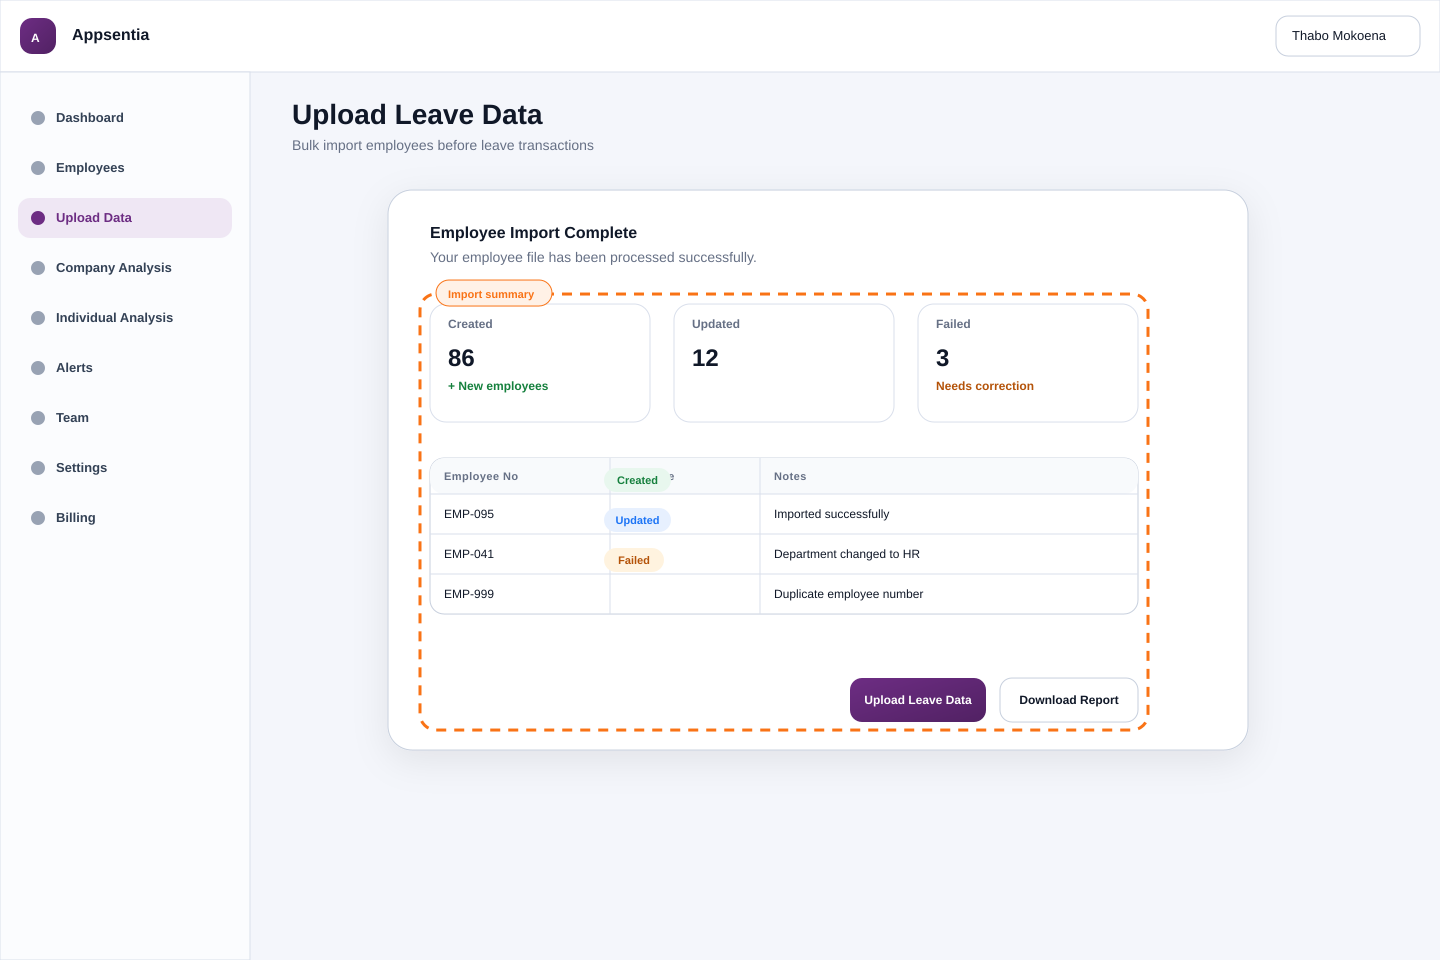
After processing, you'll see:
- ✓ Successful: Employees added to the system
- ⚠️ Updated: Existing employees with updated information
- ❌ Failed: Records with errors (download error report for details)
Editing Employee Information
Locate the Employee
On the Employees page, use the search bar to find the employee by number, surname, or department. You can also filter by status (Active/Inactive).
Open Edit Dialog
Click the employee row, then click the "Edit" button (pencil icon) in the employee details panel.
Update Information
Make your changes and click "Save". Common updates include:
- Department changes (promotions, transfers)
- Payroll cycle assignments
- Termination dates when employees leave
Managing Inactive Employees
Why Keep Inactive Records?
Instead of deleting terminated employees:
- ✓ Preserves historical absence data for trend analysis
- ✓ Maintains data integrity for audits
- ✓ Allows year-over-year comparisons
- ✓ Prevents accidental data loss
Marking Employees as Inactive
- Edit the employee record
- Set "Date of Termination" to their last day
- The system automatically sets status to "Inactive"
- Inactive employees don't count toward your employee limit
Viewing Inactive Employees
On the Employees page, toggle "Show Inactive" to see former employees. You can still view their historical analysis and reports.
Organizing by Department
Setting Up Departments
Departments enable powerful analytics:
- Compare absenteeism rates across teams
- Identify departments with higher absence patterns
- Filter analysis by department
- Generate department-specific reports
Best Practices for Department Names
✓ Do
- • Use short, consistent names
- • "Finance", "HR", "Operations"
- • Standardize across all records
✗ Don't
- • Use variations ("HR Dept" vs "Human Resources")
- • Include manager names
- • Use overly specific subcategories
Linking Employees to Payroll Cycles
Assigning employees to payroll cycles enables detection of payday-adjacent absence patterns.
Setup Process
- First, configure payroll cycles at Settings → Payroll Cycles
- When adding/editing an employee, select their payroll cycle from the dropdown
- The system will flag sick leave taken on or immediately after payday
Most organizations have one payroll cycle. If you have multiple (e.g., weekly for hourly staff, monthly for salaried), create separate cycles and assign employees accordingly.
Searching and Filtering
Search Functionality
The employee search bar supports:
- Employee Number: Exact or partial match
- Surname: Type first few letters
- Department: See all employees in a department
Filter Options
- Status: Active, Inactive, or All
- Department: Filter by specific department
- Sort by: Name, Employee Number, Department, Status
Exporting Employee Data
Export your employee list for external use:
- Apply any filters (e.g., show only active employees, specific department)
- Click "Export" button
- Select format: CSV or Excel
- Download includes all visible columns based on your current filters
Common Tasks & Troubleshooting
Q: Can I delete an employee record?
A: We recommend marking employees as "Inactive" instead of deleting to preserve historical data. Only admins can delete records, and this should be reserved for data entry errors.
Q: What if I need to change an employee number?
A: Employee numbers cannot be changed once created (they're unique identifiers). Mark the old record inactive and create a new record with the correct number. Contact support if you need to transfer historical data.
Q: How do I handle employees who transfer between departments?
A: Simply edit the employee record and update the department field. Historical absence data remains attached to the employee and will reflect under their new department going forward.
Q: I uploaded employees but they don't appear in the list
A: Check the upload summary report for errors. Common issues: duplicate employee numbers, missing required fields, or invalid date formats. Download the error report to identify specific problems.
Best Practices Summary
- ✓ Use consistent employee numbering aligned with your payroll system
- ✓ Standardize department names across all records
- ✓ Mark terminated employees as inactive rather than deleting
- ✓ Assign payroll cycles to enable payday pattern detection
- ✓ Keep records current with quarterly reviews
- ✓ Use bulk upload for initial setup or mass updates
- ✓ Export employee lists regularly for backup purposes