Use this checklist to verify that your company settings are optimized for the most accurate absenteeism analysis. Complete all items for best results.
Essential Configuration
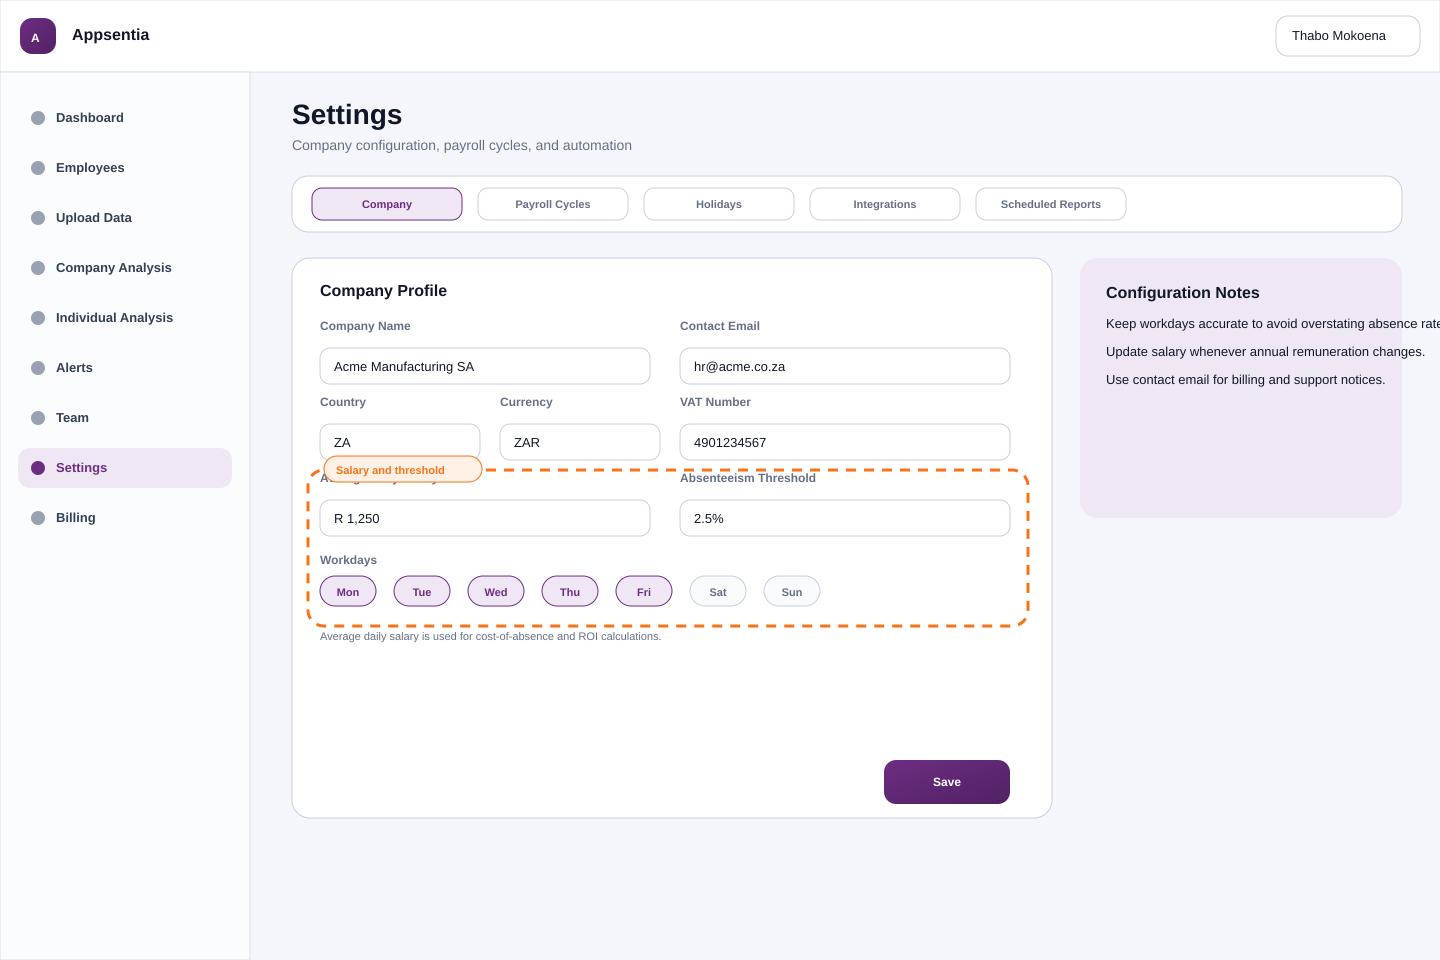
Company Profile
Navigate to Settings → Company Profile and verify:
- •Company name is correct and matches official records
- •Country is set to South Africa (ZA)
- •Currency is set to ZAR (South African Rand)
- •Contact email is monitored for important notifications
Workday Configuration
Critical for accurate absence rate calculations:
- •Select all days your employees typically work (Monday-Friday is default)
- •Ensure workdays match your actual operation schedule
- •Note: System automatically excludes public holidays from calculations
Why this matters: Incorrect workday settings will skew your absenteeism rates. If your company operates 6 days/week, make sure Saturday is selected.
Absenteeism Threshold
Set your company's acceptable absence level:
- •Default is 2.5%, between the 1.5% good-practice target and the 3.5–6% commonly reported for SA employers
- •Manufacturing/production: Consider 2.0-2.5%
- •Office/professional services: 2.5-3.5% is typical
- •Healthcare/shift work: May be higher (3.0-4.0%)
Benchmark: Published South African figures range from 1.5% (good practice) to 3.5–6% (OCSA); sources are listed on the Company Analysis benchmarks panel. Setting this too low may flag too many employees; too high may miss problematic patterns.
Average Daily Salary
Optional but highly recommended:
- •Enter your company's average daily salary (gross pay ÷ working days)
- •Used to calculate the financial impact of absenteeism
- •Can be updated anytime as salaries change
- •Leave blank if you prefer not to track costs
Data Management Setup
Payroll Cycles
Configure to enable payday pattern detection:
- •Go to Settings → Payroll Cycles
- •Add your pay cycle (monthly, fortnightly, or weekly)
- •Set the normal payday (e.g., '25th' for monthly, or 'Friday' for weekly)
- •Choose shift rule: 'previous' or 'next' if payday falls on a holiday/weekend
Pattern detection: This enables Appsentia to flag sick leave taken on paydays or the following workday, a common absenteeism pattern.
Department Structure
Organize employees for better insights:
- •Ensure consistent department names across all employee records
- •Use standard abbreviations (e.g., 'HR', 'Finance', 'Operations')
- •Avoid variations (e.g., 'HR Dept' vs 'Human Resources')
- •Leave blank only if department analysis isn't needed
User Access & Security
Admin User Setup
Ensure proper access controls:
- •Verify you have at least one admin user (yourself)
- •Set up additional admin users if needed (Settings → Team)
- •Assign 'Member' role to users who only need view access
- •Review user list quarterly and remove inactive users
Password & Security
Protect sensitive employee data:
- •Use a strong password (12+ characters, mixed case, numbers, symbols)
- •Enable two-factor authentication if available (Professional/Enterprise plans)
- •Never share login credentials with unauthorized personnel
- •Log out when using shared computers
Trial & Subscription
Trial Period
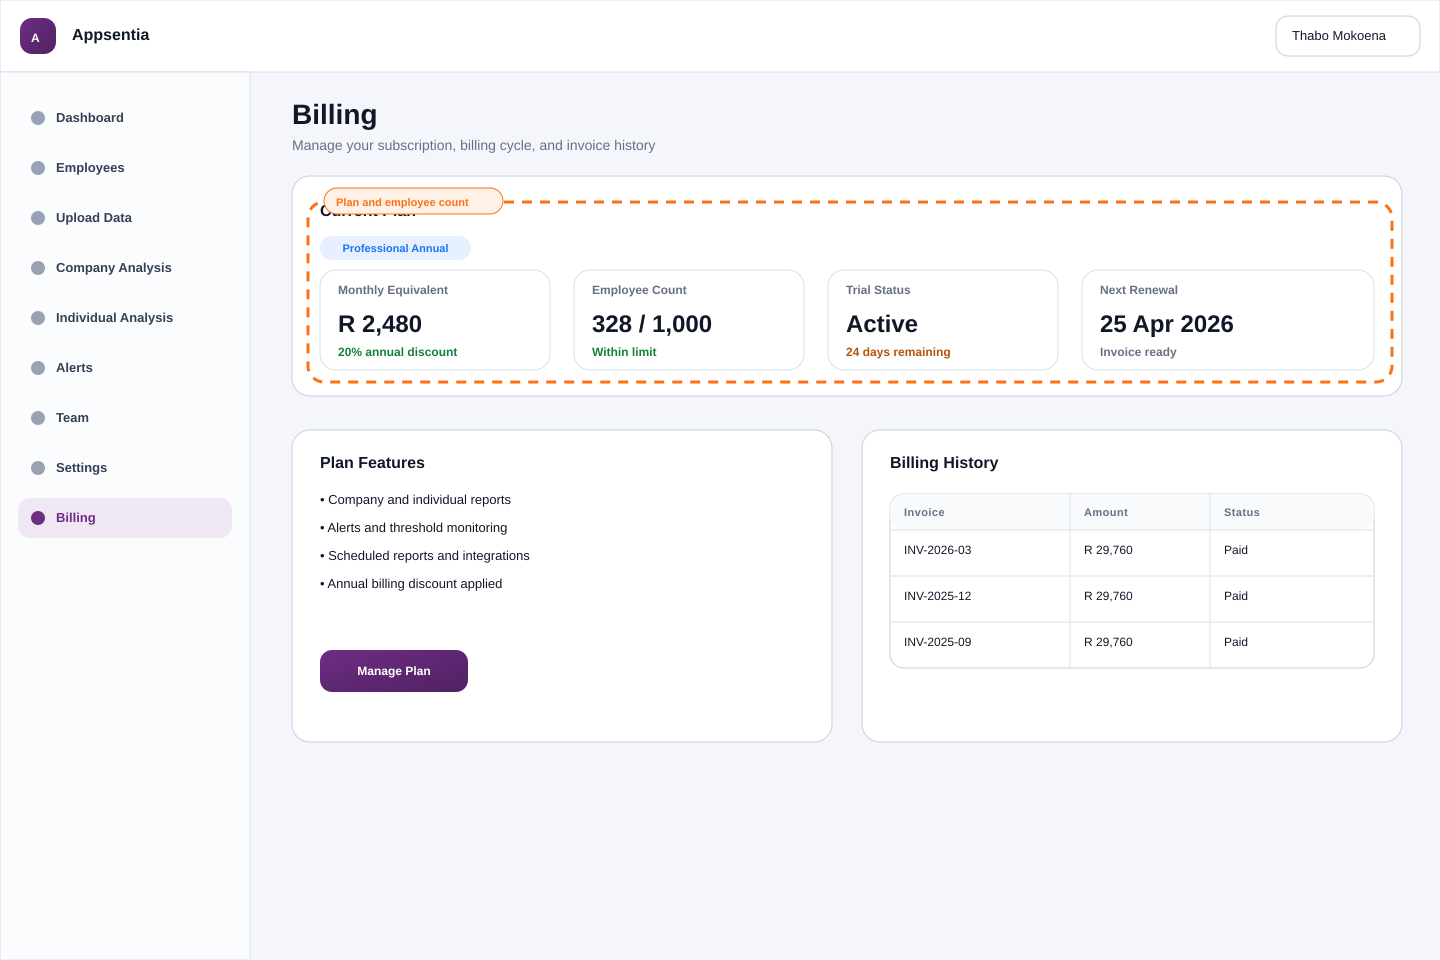
Maximize your 30-day free trial:
- •Note your trial end date (visible in Settings → Subscription)
- •Upload historical data early to see full platform capabilities
- •Test all features: Company Analysis, Individual Reports, Alerts, PDF exports
- •Decide which plan suits your needs before trial expires
Employee Limit
Ensure your plan supports your workforce:
- •Free Trial: up to 10 employees during your 30-day evaluation
- •Professional and Enterprise support self-serve teams up to 1,000 employees
- •Pricing changes by tier, platform fee, and employee bracket
- •Annual billing applies a 20% discount
- •Contact sales if you need coverage above 1,000 employees
Pre-Launch Validation
✓ Final Checks Before Going Live:
- □ Company profile is complete and accurate
- □ Workdays match your operational schedule
- □ Absenteeism threshold is set appropriately for your industry
- □ Payroll cycle configured (if tracking payday patterns)
- □ At least one admin user is set up
- □ Sample data uploaded to test the system
- □ You've explored the dashboard and understand the metrics
Next Steps
Once you've completed this checklist, you're ready to start uploading employee and leave data. Head over to the First Data Upload Guide to learn how to import your historical records.